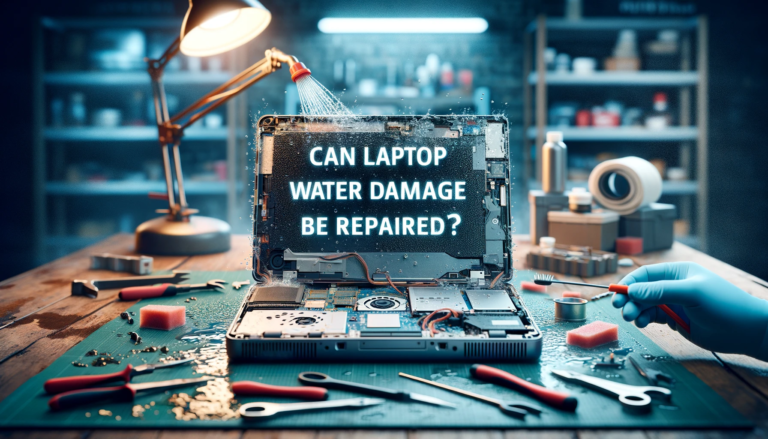
Spilling water on your laptop can feel like watching your digital life dissolve before your eyes. I’ve been there, and trust me, it’s a heart-stopping moment. But before you write off your soggy tech as a lost cause, let’s dive into the possibility of bringing it back to life.
The question on everyone’s mind after such a mishap is: Can laptop water damage be repaired? I’m here to explore the answers and give you a glimmer of hope. With the right approach and a bit of luck, you might just be able to rescue your waterlogged companion.
Repairing water damage is a tricky affair, and I’ll be the first to say it’s not always successful. However, understanding the extent of the damage and the steps to take immediately after the incident can significantly increase your chances of a positive outcome. Let’s get to the bottom of this soggy situation.
Understanding Laptop Water Damage
When faced with a soggy laptop, it’s critical to assess the situation promptly. Immediate response is pivotal to potentially salvaging your device. Even then, I’m fully aware that it’s not just about drying out the laptop; it’s about understanding the extent of the damage that’s occurred internally.
Let’s delve into what happens when a laptop meets water. On contact, water can short-circuit various components, leading to immediate malfunction. However, sometimes the damage is more insidious, manifesting over a period as corrosion sets in. Electronics and fluids are a recipe for disaster, with each drop potentially wreaking havoc on delicate circuitry.
To begin with, if you’ve spilled water on your laptop, time is of the essence. Here are the steps you should take swiftly:
- Power off the laptop immediately.
- Disconnect all peripherals and detachable parts.
- Drain any excess liquid by holding the laptop upside down.
- Use a lint-free cloth to gently dab away moisture.
Do keep in mind that tap water and beverages often contain minerals and sugars that can exacerbate the damage through corrosion even after drying out the laptop. Distilled water, while less harmful, can still cause serious issues.
When it comes to water damage, the laptop’s warranty often offers little solace. Most manufacturers don’t cover water damage under standard warranties, so a glance through the terms is usually a sobering process.
Some types of damage are more manageable than others. For example, a keyboard affected by a spill is a relatively straightforward fix. In contrast, a short-circuited motherboard poses a far greater challenge.
With these insights on the implications and types of water damage, it’s evident that a careful and meticulous approach is required to ascertain whether a laptop can rebound from an aquatic mishap. Understanding the signs and knowing how to react can make all the difference.
Assessing the Damage
Once I’ve dealt with the immediate aftermath of a water spill, it’s essential to assess the damage to determine the viability of a repair. The extent to which water has infiltrated the laptop’s inner components is a crucial factor. The motherboard, for example, is a hotspot for disaster. If water reaches this central nerve system of the laptop, I might be facing a more complex and costly repair.
Opening the laptop, which I recommend only for those comfortable with handling electronic components, can provide a clearer picture of the damage. I look for any signs of residue or corrosion, which often appears as a white or greenish crust. This can indicate that the liquid has started a destructive process that, if not addressed, can render the laptop useless.
- Check the motherboard and other circuitry for corrosion or discoloration.
- Look for apparent signs of damage on the screen, keyboard, and other interfaces.
Using a Multimeter
Beyond visual cues, a multimeter can help gauge the electrical functionality of the components. This device allows me to check for shorts or breaks in the circuit which can be indicators of water-induced damage.
Professional Diagnosis
If I’m not experienced in DIY electronics, it’s wise to bring the laptop to a professional. They can provide a thorough diagnosis using advanced tools, proficiently inspect and test different parts for functionality, and give me an accurate repair quote.
It’s worth noting that some internal damage can be insidious. It may not manifest immediately but can cause problems down the line. This makes it all the more important to have the laptop assessed promptly. Regular check-ups and professional cleanings can prevent long-term issues that might arise from residual moisture trapped within the system.
In understanding which parts have suffered damage, I pave the way for a clear decision-making process regarding possible repairs or replacements. Certain components like the RAM or storage drive may be unharmed and salvageable. But it’s the more delicate parts such as the processor or graphics card that will make or break the success of a laptop’s recovery post water damage.
Steps to Take Immediately After the Spill
When you’re facing the dreaded spill on your laptop, speed is of the essence. First and foremost, power down your device immediately. This action can significantly reduce the risk of short-circuiting vital components. Next, unplug the charger and remove the battery if it’s accessible. By doing this, you’re taking control of the situation and preventing further electricity from fuelling potential damage.
Remove any external devices such as USB drives, mice, or external hard drives. These peripherals could also suffer from water exposure and cause more electrical issues if left connected. After you’ve secured the safety of surrounding devices, flip the laptop over to allow as much liquid as possible to drain away from the critical components. This orientation can aid gravity in doing its job and potentially save your device’s inner workings from ruin.
While the laptop is upside down, take a dry towel or cloth and gently dab away moisture. It’s crucial not to rub or apply force, as this could push the liquid further into the crevices of the laptop. If water has entered between the keys of the keyboard, gently shake out excess fluid while keeping the device inverted.
If you’re technically savvy and confident enough, you may wish to remove the back panel of your laptop. Doing so can give you a better chance to address internal moisture by creating airflows to aid in drying. However, I strongly advise that this be done with utmost caution and, preferably, by someone who has experience disassembling electronic devices.
Keep the laptop in a dry, warm place to facilitate the drying process. Using desiccants such as silica gel packets can help absorb moisture but should be employed with the understanding that while these actions may help, they are not a replacement for professional repair services. Remember, the effectiveness of damage control strategies will vary with factors like the type of liquid, the duration of exposure, and the laptop’s own design.
Avoiding Common Mistakes
When dealing with laptop water damage, it’s crucial to sidestep common pitfalls that could potentially worsen the situation. Based on my experience, I have compiled a list of mistakes to avoid, to give your laptop the best chance at recovery.
- Do Not Turn On the Laptop: Perhaps the most critical mistake to avoid is the urge to power on the laptop to check if it’s working. This can cause a short circuit, leading to irreversible damage. It’s essential to wait until the device is completely dry.
- Avoid Using a Hairdryer: Using a hairdryer might seem like a quick solution to drying your laptop but it’s risky. The heat can warp components and spread moisture to areas that were not initially affected.
- Skip the Rice Myth: A common misconception is that placing electronics in rice can effectively draw out moisture. In reality, this method is not only ineffective but can also introduce dust and starch into the laptop, which can cause further complications.
Taking the time to properly dry your device is far more beneficial than these quick fixes. After ensuring all visible moisture is gently dabbed away and all removable parts are separated, let the laptop dry naturally in an environment with low humidity. Silica gel packs are excellent at absorbing moisture and are a safer alternative to rice.
In the event of a spill, it is tempting to immediately try and remedy the situation; however, a careful approach is necessary. If you’re uncomfortable disassembling your laptop to dry it out, it’s better to leave it to professionals. Unauthorized disassembly can void warranties and might do more harm than good if not done properly.
Remember, handling water damage to electronic devices calls for patience and a methodical approach. Quick fixes might seem appealing, but they often fall short and can exacerbate issues. Taking preventive steps and knowing what not to do can make a significant difference in the outcome of your water-damaged laptop.
The Process of Repairing Laptop Water Damage
When it comes to repairing water damage on a laptop, the complexity can vary widely, depending on the extent of the damage and the type of water involved. First and foremost, my advice is to assess the situation carefully before attempting any repairs. If the internal components are significantly damaged, professional repair services might be required.
For minor water exposure, there are some steps I often recommend. The initial stage of the repair should start with a thorough drying process. While silica gel packs are excellent for this, sometimes disassembly is necessary to dry out hidden moisture. It’s crucial to ensure that the device is completely dry before attempting to reconnect or turn on any components.
Secondly, inspecting all affected areas is crucial. Water can cause oxidation and corrosion, which can spell trouble for delicate internal parts. If there’s visible residue or corrosion, I’ll carefully clean the components using a soft brush and isopropyl alcohol, which is known for evaporating quickly and not leaving any residue behind.
Next, I’ll usually test the individual components, such as the battery, memory, and storage, to determine if they’re functional. This helps me isolate the problem areas. Replacement parts may be necessary if the damage is beyond simple repairs. Here’s a quick breakdown of the components that might need to be tested or replaced:
- Motherboard
- Battery
- RAM
- Hard Drive or SSD
- Keyboard
- Display
Finally, reassembly should be conducted with precision. I’ll make sure all the connections and cables are secured properly while keeping an eye out for any signs of malfunction. It’s important to remember that patience is key during this process. Rushing can lead to oversights, which might exacerbate the problem.
Once everything is back in place, the moment of truth arrives. Powering on the laptop after repair is always a delicate moment. If the laptop boots up without issue, it’s a good sign, but I’ll still run a series of tests to ensure all systems are fully operational.
Repairing laptop water damage is a challenging task and, although DIY approaches are possible, they come with risks. Always consider seeking professional advice if the damage seems beyond basic troubleshooting or if you’re unsure of the repair steps. It’s better to invest in expert services than to risk further damage to your already sensitive equipment.
Conclusion
Repairing laptop water damage is indeed possible with the right approach and a steady hand. I’ve walked you through the essential steps to mitigate and fix the damage but remember that precision and patience are your best allies here. If you’re ever in doubt or the damage seems severe it’s wise to turn to a professional. They’ll have the expertise to revive your tech without causing further harm. So don’t lose hope if you’ve had a spill—action and expertise can often bring your laptop back to life.


